15. SLAM with ROS
SLAM With ROS
SLAM with ROS
Here's the
LAB solution
! While scrolling through the instructions, you will notice that some statements are a bit different than the one presented in the videos. The reason behind that is the different environment used. In the videos, a
Virtual Machine
booted with LUbuntu is used. Here in the description, you are presented with instructions on how to replicate the steps in the
Udacity Workspace
. The only difference between what you see and what is listed is the directory of the
catkin_ws
. In VM, you can store it anywhere you want, preferably in the root
~
directory. Whereas, in the workspace, you will have to store it under
/home/workspace/
so it won't get deleted after a reboot.
First, clone the gmapping package, install its system dependencies, and build your catkin workspace
$ cd /home/workspace/catkin_ws/src
$ git clone https://github.com/ros-perception/slam_gmapping
$ rosdep install gmapping
$ cd..
$ catkin_make
Terminal 1
Launch the turtlebot in a Willow Garage environment
$ cd /home/workspace/catkin_ws
$ source devel/setup.bash
$ roslaunch turtlebot_gazebo turtlebot_world.launch world_file:=worlds/willowgarage.world
Turtlebot should now appear in a Willow Garage environment.
Terminal 2
Launch the keyboard teleop node
$ cd /home/workspace/catkin_ws
$ source devel/setup.bash
$ roslaunch turtlebot_teleop keyboard_teleop.launch
Don’t move your robot yet!
Terminal 3
Run the slam_gmapping node
$ cd /home/workspace/catkin_ws
$ source devel/setup.bash
$ rosrun gmapping slam_gmapping
The node should start registering your first scan.
Terminal 4
Run rviz and subscribe to different published topics to visualize the map
$ rosrun rviz rvizEdit the rviz configuration as follows:
-
Change the
Fixed Frame
to
map - Keep Reference Frame as default
- Add a RobotModel
-
Add a
camera
and select the
/camera/rgb/image_rawtopic -
Add a
map
and select the
/maptopic
Now, map the environment by driving your robot using keyboard commands.
Terminal 5
Save a map of the environment and share it with your classmates
$ cd /home/workspace/
$ rosrun map_server map_saver -f myMap
With the map_server you can load and save maps. Running map_server will generate the map.pgm and the map.yaml files:
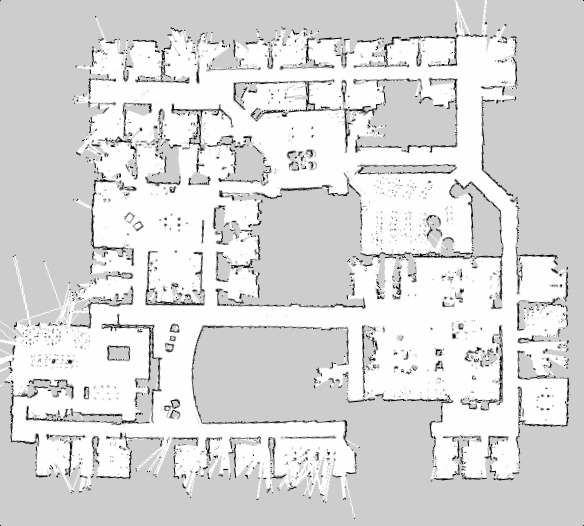
map.pgm of the Willow Garage environment
1- map.pgm : Picture of the map in occupancy grid representation
- White pixels : Free cells
- Black pixels : Occupied cells
- Gray pixels : Unknown state
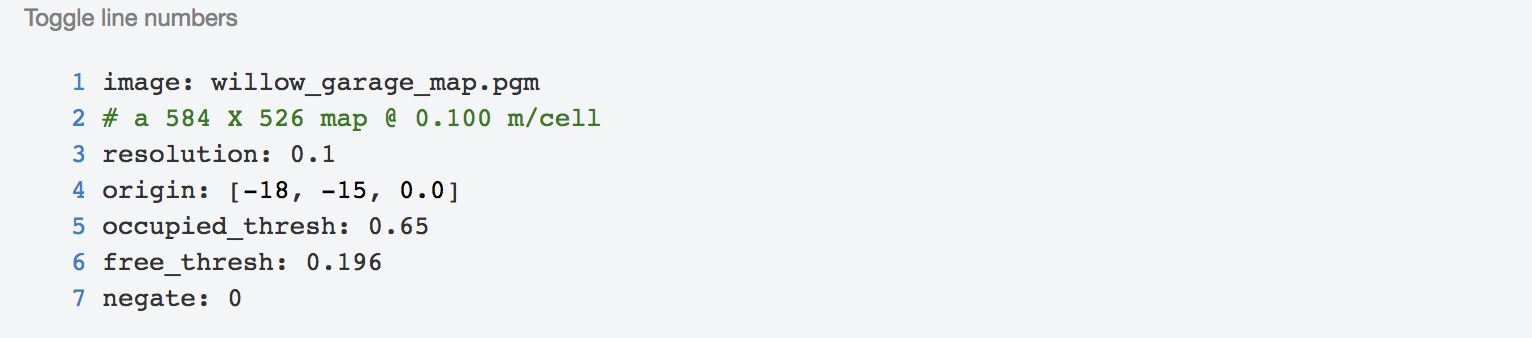
** map.yaml** of the Willow Garage environment
2- map.yaml : The map metadata
- image : Map name
- resolution : Resolution of the map (meters/pixel)
- origin : Pose of the lower-left pixel in the map (x, y, Θ)
- Occupied_thresh : Cell is considered occupied if its probability is greater than this threshold.
- free_thresh : Cell is considered unoccupied or free if its probability is less than this threshold.
- negate : This value will check whether the notation of black colored cell=occupied and white colored cell = free should be preserved
Wondering why you got a bad quality map?
That’s because the gmapping parameters values used were the default values. In general, it’s essential to tune them in order to get a 100% accurate map. These parameters are all listed under the gmapping documentation, where you can look at them yourself. If you experiment with some of these parameter values, you should be able to get better maps.
For example, you might try, reducing the angularUpdate and linearUpdate values so the map gets updated for smaller ranges of movements, reducing the x and y limits, which represent the initial map size, increasing the number of particles.
You can try tweaking these parameters and/or any other parameter you think should be changed.